Gumball Greetings Easel Card Video

It is so good to have Elizabeth in her house and back stamping and making videos! She hasn’t lost her touch! I love her color combinations!


For her Gumball Greetings Bundle card and video, she used

  • Gumball Greetings Bundle #157648 $41.25

  • Abstract Beauty 4 x 6 Specialty DSP(48 sheets) #158039 $ $15.

  • Gumball Machine Shaker Domes ( pkg. of 10) #158131 $7.

  • Frosted Beads Assortment #158132 $7.50

  • Gold Foil Sheets #132622 $5.

  • Magenta Madness Cardstock #153080 $8.75

  • Stampin’ Up White Embossing Powder and Gold Twine and 2021-2022 In Color Jewels #155571 $7.

Card stock dimensions are:

  • Magenta Madness: 4 1/4” x 4 1/4”, 4 1/4” x 11” scored at 2 3/4”, 5 1/2”, and scrap for die cutting

  • Abstract Beauty: 4” x 4”, 1 1/2” x 3 7/8”

  • Gold Foil: 1 5/8” x 4” and scrap for die cutting

  • Basic White: 2 1/2” x 3”

We’ve been having so much fun with the gumball machine! This month I used it for one of our scrapbook spreads. Keep scrolling for pictures.

For a detailed picture tutorial, click on the previous post entitled Gumball Greetings Easy Shaker Card

Did you know that you can click on the picture and it will enlarge? Once it’s enlarged you can click on the right arrow and scroll through all the pictures in a group.

You too can join me for scrapbooking ….we meet once a month, usually the 3rd Saturday of the month. Cost is $20 for the 4 pages. Here’s what we created this month

You may wonder how we created the gold bling on the Misty Moonlight 12 x 12 pages? It’s made with applying a tiny, thin layer of Tombo multipurpose adhesive with a Qtip on the cardstock and then pressing Stampin’ Up Guilded Leafing on and then brushing off the excess with a sponge.

Our Valentine spread was created using the Sweet Conversations Bundle #157624 and Sweet Talk DSP #157616. So easy to make your sweet valentine cards with this bright, fun, cute Designer Series Paper!

Card Buffet: this Friday & Saturday

Friday, January 28 and Saturday, January 29th I have a card buffet at my home. I have some space on Friday and more space on Saturday.

Come make your choice of cards (there are 15 to choose from) and how many of each you want to make. Cost is $2.50 each and when you make 8 cards, your 9th one is free.

Please RSVP. You can see all of the cards on last week’s post, Gumball Greetings Easy Shaker Card.

Birthday Stampin’ Blitz

Last call to join us for making 20 Birthday cards February 26th! Please contact me directly if you would like to come! You may look back on previous web entries for all the specific info.

Thanks for visiting! Esther

Gumball Greetings Easy Shaker Card/Card Buffet

Shaker cards are so fun and interactive! Stampin ‘ Up has made it super easy with the Gumball Machine Dies in the January - June 2022 catalog.

I’ve got a picture tutorial for you today and hopes that Elizabeth will have a video for you soon.


The little gumball machine is soooo cute and looks so so just like the real thing! The embossing on the silver is so realistic and the turnstile turns round and round! :)

The coin has a real slot that you can open a bit so the coin will stick out and then there is a little flap the can be flipped up. I stamped gumballs on a piece of cardstock so it looks just like gumballs are ready to fall out.

You’ll want to order your Gumball Greetings Bundle #157648 $41.25 and get some of the Frosted Bead Assortment #158132 $7.50 (we filled over 20 cards with one package), and Gumball Machine Shaker Domes #158131 $7. for a package of 10 domes.

Placing an order for the bundle, domes, and frosted gumballs will enable to our get a free Sale-a-braion gift from the 2022 Sale-a-bration flyer. That’s an added perk during this time of year! :)

Lets begin!

  • Die cut pieces for gumball machine first. I used Silver foil and Real Red cardstock for machine

  • Be really really careful with the little thin die for the top of the gumball machine lid!!! I am so afraid I’m going to lose it! I don’t think we’ve had such a small die before but it so looks good on the lid for the top knob!! Love it!

  • Next, adhere the pieces together to make it 3D like this

  • Using a pick, make a hole in the square die cut Silver Foil and put a brad through both turnstile and square and spread the brad legs in the back

  • Stamp coin on Basic Grey cardstock with Basic Grey ink and die cut

  • When you attach the coin use a Mini Dimensional to attach so it is more 3D

  • Also, using Stampin’ Write markers, color the gumballs stamp with different colors (here I used Granny Apple Green, Pool Party, and Flirty Flamingo) Huff to add moisture and stamp on a piece of CS 3/4” x 1” to adhere under the flap for gumballs to come out

  • Place your gumball machine on to the Designer Series Paper you are using as background (here I used Sweet Talk DSP #157616 pg. 9 in January to June 2022) or your cardstock background for a guide placement for the die to cut opening for dome

  • And stamp sentiment and die cut. Here, I used Real Red ink on Coastal Cabana cardstock and die cut with Stitched So Sweetly Dies #151690

  • Next peel off the waxed paper on the top outside of your dome and place the DSP or background CS over it. Press around to seal securely.

  • stamp the dome lines with highlights in Basic Grey ink on a piece of Basic White CS measuring 2 3/4” square

  • Turn the dome over to expose the opening and put about 1/2 teaspoon of Frosted Beads Assortment #158132 in it.

  • Hardest part…right here but YOU CAN do it!!! take the waxed paper off back of dome and hold it up to see through dome to place stamped dome lines in place OR you could put a piece of Window Sheet over it to seal while back is up and then pick up to place stamped dome lines with glue dots on the corners of Basic White CS

  • Press to seal beads inside

  • Your on EASY street now…..attach to a Real Red matte ( my measurements for Real Red matte 4” x 5 1/4” and DSP is 3 7/8” x 5 1/8”

  • Attach to card base. I used Coastal Cabana 5 1/2” x 8 1/2”, scored at 4 1/4”

  • Attach sentiment with dimensionals

  • Stamp inside and envelope

Your assignment….go have fun and make more!

Card Buffet - Friday, January 28th and Saturday, January 29th

  • Friday, January 28th - 10am to 5pm

  • Saturday, January 29th - 10 am to 4pm

  • Make the number and style of cards you want

  • Cost is $2.50 a card or make 8 and get the 9th one free

  • There are at least 15 styles to choose from. Following are many of them

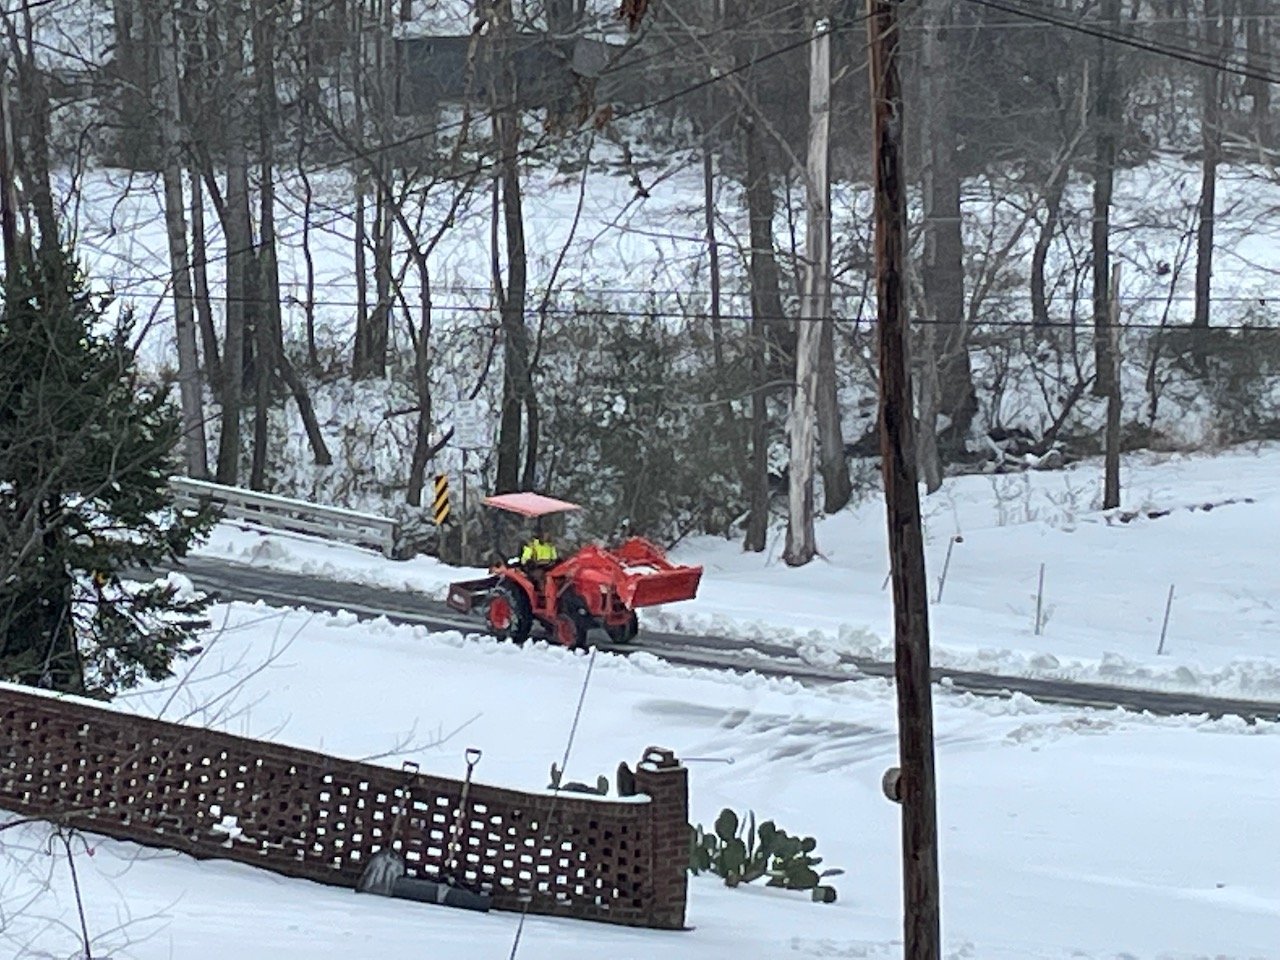
And, one proud mama moment….my youngest son came over today without being asked and ate lunch with us and then plowed the road in front of our house up to the road. I appreciate him and love him so much along with all my other adult babies :)


Birthday Stampin’ Blitz!!!

coming February 26th! 8 am to 8 pm and make 20 birthday cards!

Confirmation and $75 due January 23rd

Thanks for visiting!

Esther

Stamptogether Team Meeting


Why should I be a part of Stamptogether Team?

  • Save Money by getting a discount on my purchases

  • Enjoy the fellowship, enjoy learning a bit more about the art of rubber stamping, and enjoy goodies(food and gifts) every couple of months at my in person or virtual team meets.

  • Order products 1 month early each new Stampin’ Up catalog before customers begin ordering.

  • Have a small business and earn Stampin’ Up supplies, money, and incentive trip or just order for yourself with a discount….you are welcomed either!

  • Extra perks when you join my team January and February 2022. Choose 2 free current stamp sets after choosing $125 of current Stampin’ Up products for $99 - your choice of current products

It’s a great time to join my team of Stampin’ Up demonstrators during January and February Sale-a-bration. The “join” kit is $99 for $125 of your choice of Stampin’ Up products plus your choice of 2 free stamp sets. Please contact me with any questions you might have. I’m happy to answer all your questions. Also, you may find out more on my website to join via the link below

January and February are always exciting times! Ever since I joined Stampin’ Up about 20 years ago, there’s not been the let down after Christmas. It’s been a time of excitement and always exciting to see what new Sale-a-bration products I can earn free and create fun projects!

As a customer, or demonstrator, we get a free gift with every purchase of $50 or $100!

It’s kinda funny this year….there was one set I wasn’t too excited about, but I’ve made a card I really like! Here it is………


It totally looks like the palm branches are peeking out behind the sentiment. And the sentiment matte and potted plant have a bit of gold bling on them from Stampin’ Up Gilded Leafing #1154560 held on by a smidge of Tombo multipurpose glue#110755. And! I totally love the sentiment from Special Moments, another Sale-a-bration freebie with spending $100 before tax and shipping. Get yours today and see what lovely project you can create!

Here are some highlights from our recent team meeting. I forget to take pictures….sorry! But swaps are a highlight!

We have such wonderful and creative ladies. Everyone did such a beautiful job on creating for swaps this meeting! Thank you to all that participated!!!!

And here are a few more card ideas from Sale-a-bration products. It’s an fantastic time to host a get together! As a host, you earn an extra free stamp set called Calming Camillia - just the right time of year….blooming beautifully in the winter! It’s super easy to use and has lots of wonderful sentiments to use everyday! Please reach out by email or phone to set a date for your card making get together!


Birthday Stampin’ Blitz

Come join the fun! Make 20 birthday cards to start this year ahead! You’ll make 2 cards of 10 designs.

Confirmation sheet and money are due January 23rd. Please click on last week’s post named Birthday Stampin’ Blitz to print off confirmation sheets and see bundles.

I’m excited to use Stampin’ Up’s NATURAL TONES STAMPIN’ BLENDS COLLECTION! It’s item #160940 for the complete collection of 10 Blends markers. These are titled by number; SU100, SU200, and so forth to SU1000. You can make 100 combinations with these 10 blends markers. Get your set today!

Mark your calendars for Friday, January 28th for card buffet 10am to 6pm. this will be at Esther’s house (email for directions). Bring a friend and plan to stay awhile. When you make 8 cards, the 9th one is free. Cards are $2.50 each.


Thanks for visiting! Please reach out to me at any time with questions. To order, please click on the below button for a direct link.

Esther

Birthday Stampin' Blitz.....coming February 26th 2022

Our Mini Creative Escape last November was such a success, we’re doing it again this February 26th 2022 for Birthday Cards!

We’re also making a name change to….Stampin’ Blitz!

Come join the fun! It’s a celebration! It’s a party! On February 26th, one day - 12 hours you’ll make 20 birthday card, 2 of 10 different designs including at least 1 masculine and several kid birthday cards.

Cost of $75 and confirmation sheet is due by January 23rd and amount for your product bundle is due by or on February 26th. If you product bundle is $50 or more, please put your choice for SAB product on your confirmation sheet.

Cost of $75 includes:

  • consumables for 20 cards

  • adhesives

  • small gift

  • 3 meals (breakfast, lunch, and supper with dessert bar)

Extras - Vikki, our massage therapist will be available for massages that afternoon again.


January Card Buffet…..Friday, Jan. 28th 10am to 6pm

Drop in and make as many cards of whatever design you like! Friday, January 28th from 10 am to 6pm. Cards are $2.50 or make 8 and get the 9th one free. Below are a few of the cards you will be able to make.

Cards designed by You!

I love showing off the cards I receive from you all! Such talent! These cards are by Pam and Vanessa.

Thanks for visiting with me! I’m excited for a bright new year with you all!

Esther

Stitched Tringles Christmas Trees by Stampin' Up

I have lots to share tonight with you! First are Christmas scrapbook spreads from last week, Birthday Stampin’ Blitz, and lots of creative Christmas cards!

December scrapbooking was totally for keeping your Christmas memories alive using Stampin’ Up Stitched Triangles Dies #152710 and current/retiring Designer Series Paper Sweet Stockings #156281, Painted Christmas #156292. Peaceful Prints, and Home For Christmas.

  • Choose Designer Series Paper to match with your Christmas theme colors

  • Cut in strips of 1/2” or 3/8”

  • Adhere to a piece of Basic White CS side by side with no spaces in between

  • Die cut the Stitched Triangles of all sizes

  • Embellish trees as you like….here I used Champagne Rhinestones #151193 and splattered with retired Champagne Shimmer Paint

Birthday Stampin’ Blitz

Mini Creative Escape has been renamed to Stampin’ Blitz….one day, 12 hours of stamping to turn out 20 cards! The next Stampin’ Blitz will be Saturday, February 26th at the Gaston Sr. Center in Dallas (where the Christmas card mini CE was).

You will make 20 birthday cards….2 of 10 different styles. This will include a masculine and child birthday cards.

A cost of $75. plus purchase of a bundle through me outside of any other event will include all consumables for 20 cards, adhesive, a small gift and 3 meals. You will take your bundle home that evening at the end of the Stampin’ Blitz. You may choose a SAB gift for your bundle if it is $50 or more.

I will have a reservation form for you to fill out by next week along with the stamp sets I plan to use.

Vikki will also be there in the late afternoon to do chair massages unless I hear guests missed out on a chair massage because of time restraint.

Creative cards by you!

I love seeing all the beautiful cards you make! It makes me smile to see how creative each one of you is! Enjoy all the beautiful cards I received this past couple of weeks

A very Merry Christmas to you all! I hope each one of you has a blessed year of health and strength to love and serve the Lord, family, and others! I look forward to seeing each one of you through out this year stamping together and having a wonderful time!

Esther

Giving Gifts Dies Treat Box by Stampin' Up

Everyone loves a gift! It’s a small way to say a BIG you are special to me! I love all my customers and downline as friends….you all are so special to me! And I am so grateful for the relationship I have with each one of you!

This year, we made each of my club members one of these little treat boxes. I think they are so easy to make and sweet to look at.

These treat boxes are made with The Giving Gifts Dies…..now retired unfortunately! Here is the tutorial if you already have this die set or maybe you have another die that will work.

  • Begin by cutting your card stock 4 1/4” x 7 1/4” and a piece 4 1/8” x 7 1/8”

  • Next score 1 1/4” from the edge on all 4 sides of both pieces (top and bottom of box) I have included a picture of it in Basic White card stock so you can see where the score lines are

  • Fold at the score lines to train your card stock

  • Place die in the middle section of the 4 1/4” x 7 1/4” piece of CS and run through die cutting machine

  • Next cut to the score line on the long sides to make a square corner

  • And adhere the sides to make the corner as in pictures

  • Do this for both top and bottom of the treat box (click on pictures to enlarge)

  • Next fill your treat boxes and decorate

  • Here, I used a snowflake out of the Gift Giving Dies and topped with a Guilded Gem # 152478 pg. 142 in the Annual Catalog

  • The box is held closed by Stampin’ Up Gold Shimmer Ribbon…now retired

  • And a touch of nature…..a sprig from our Hemlock tree outside

  • Enjoy! Make some for Christmas or change it up for Valentines! I’ve included a picture from Judy and some she made to include in her family’s Christmas box. Aren’t the sweet!!!

Team Meeting - January 8th!

Happy New Year! and What a way to celebrate….with Sale-a-bration and a new January - June mini catalog! Love the Valentine’s set and DSP this year!

I invite all my team members to come on January 8th - if well please or you may Zoom with me that day. If you plan to Zoom, please let me know via email or text so I know to send you an invite the day before.

Actual meeting is at 10:00am at Park Street United Methodist Church, 120 Park Street in Belmont

Swaps will be the theme of Sale-a-bration 2022 - make 10 please

Zoom will be held at 3:30pm that afternoon

Christmas Cards

As you do, I love receiving Christmas cards in the mail and sharing them too! I love to see all of your creativity, color, and variety - everyone is so beautiful and special! Here they are to inspire you.

New January to June mini catalogs will be coming in the mail to you. It has some exciting stamps, dies, and paper in it! I can’t wait to share with you. If you would like to join in my clubs this year, you are welcome to try one out! We’d be happy to have you!

I have updated the calendar above for January 2022.

Merry Christmas!

thanks for visiting with me! Have a safe holiday and make many good memories! Thank you all for a wonderful 2021! Esther

Eden's Garden Sympathy Card

Finally, I got to make a sympathy card with Eden’s Garden! It’s such a soft, comforting image and Designer Series Paper. I love how it looks and especially the oval wreath to surround the sympathy sentiment.

I invite you to join me this Thursday, December 16th at the Gaston Sr. Center in Dallas NC for card class. You will make the following 4 projects.

Cost is $10 for the 4 projects. Class will be held at 1:00pm in the main Sr. Center room. Make sure you RSVP to Esther by Wed., Dec. 15th please.

Christmas Cards to inspire you!

I love to show off the Christmas cards I receive during the month of December! Here are a few I have opened so far….there’s more to come of these beautiful, creative gifts! I promise my pictures do not do them justice.

Annette - used Poinsettia Petals bundle. This card is truly a gift itself! There is a little tea light behind the poinsettia

Peggy - used Cloche Dies

and Roberta - used retired Dashing Deer

This months Paper Pumpkin was a WINNER! see how cute these little gift containers are! Love Love Love them!

This month’s Paper Pumpkin has been mailed, but you may join Paper Pumpkin and start receiving your paper crafting box in the mail each month by going to paperpumpkin.com and subscribing. At the very end please identify me as your demonstrator.

And one other proud moment in my life…..I have definitely had many and am so pleased with ALL my children and their life choices, dedication to the Lord, hard work, and that they still visit with us. :)

This Saturday, Joshua graduated with a doctorate of Physical Therapy.

Thanks for visiting! I hope to see you stamping very soon! Right around the corner is Sale-a-bration in January and February with a new January to June 2022 mini catalog with more awesome products!!! I am so looking forward to playing with the new Daffodil bundle :)

Also, if you are on my team….our next meeting is January 8th! Make swaps from SAB products or something from the new mini catalog please. Looking forward to a fun new year!!!

Next week will be a picture tutorial of Ferrero truffle gift boxes. It make a beautiful gift!

Esther

Sweet Conversations picture tutorial NEW Stampin' Up

I love getting new stamps and dies to play with! And am excited to share with you Stampin’ Up January to June 2022 mini catalog with you!

Ordering will begin January 4th for customers or if you are a demonstrator under me, you may order these products now.

Sweet Conversations was top on my list! I love the Designer Series Paper that coordinates with it! It has the traditional Real Red hearts as well as the traditional sweet heart conversation candies that are pink, purple, yellow, and green! Makes me looking forward to Valentine’s Day :)

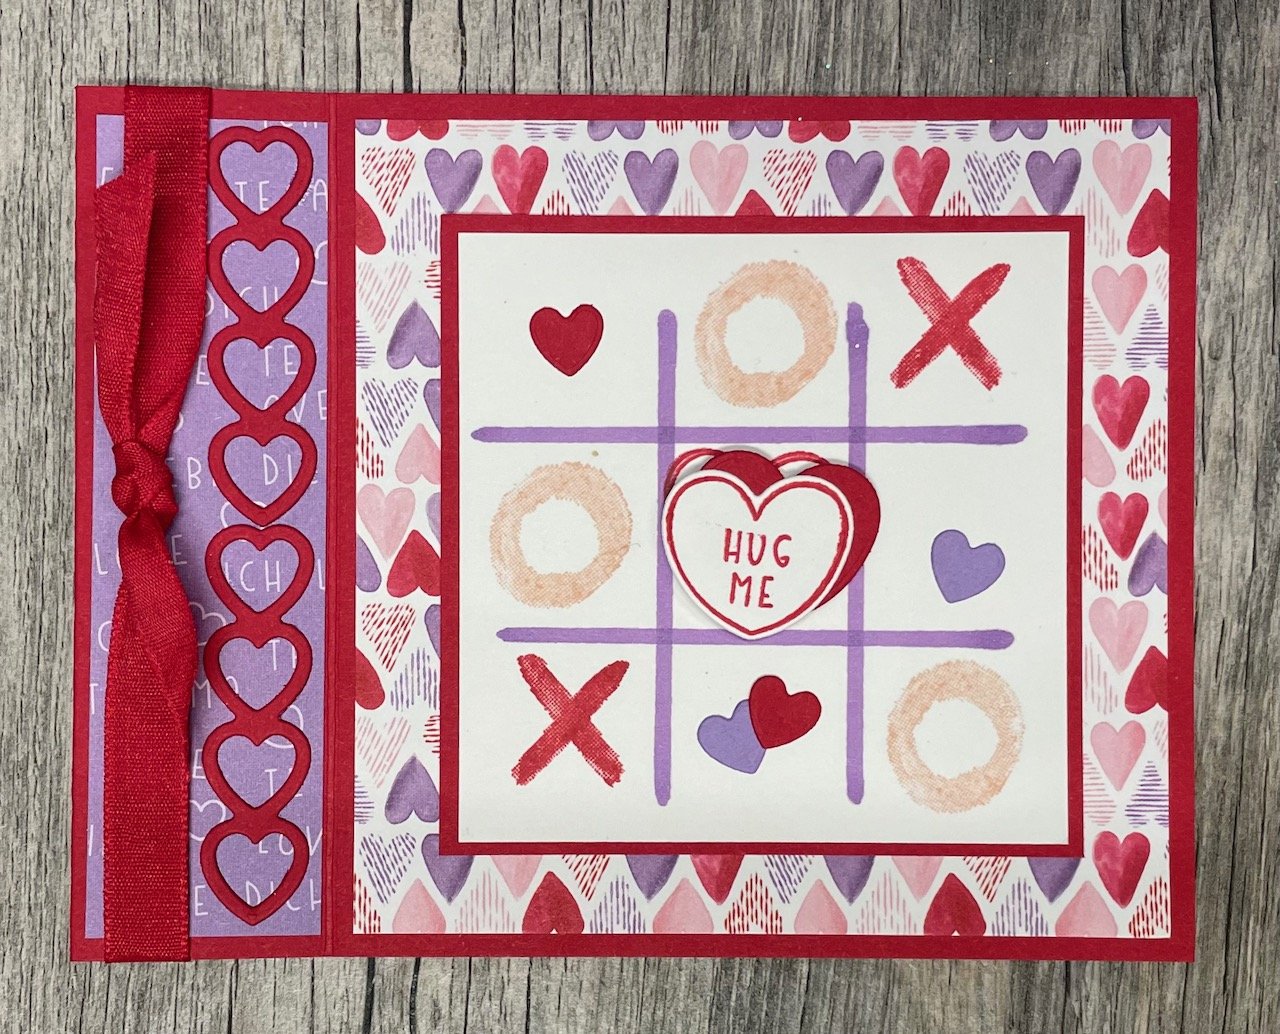
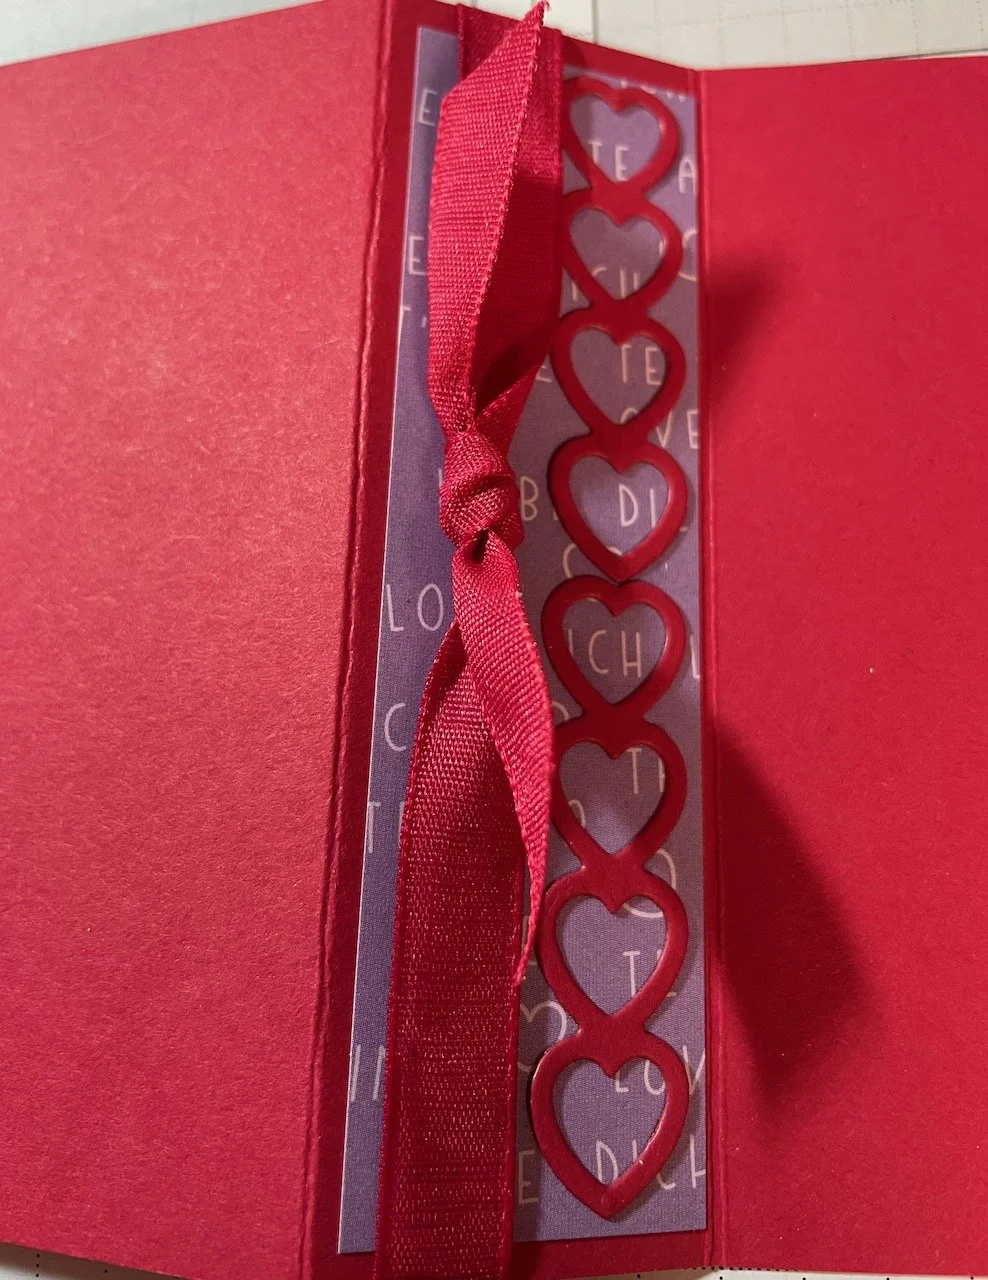
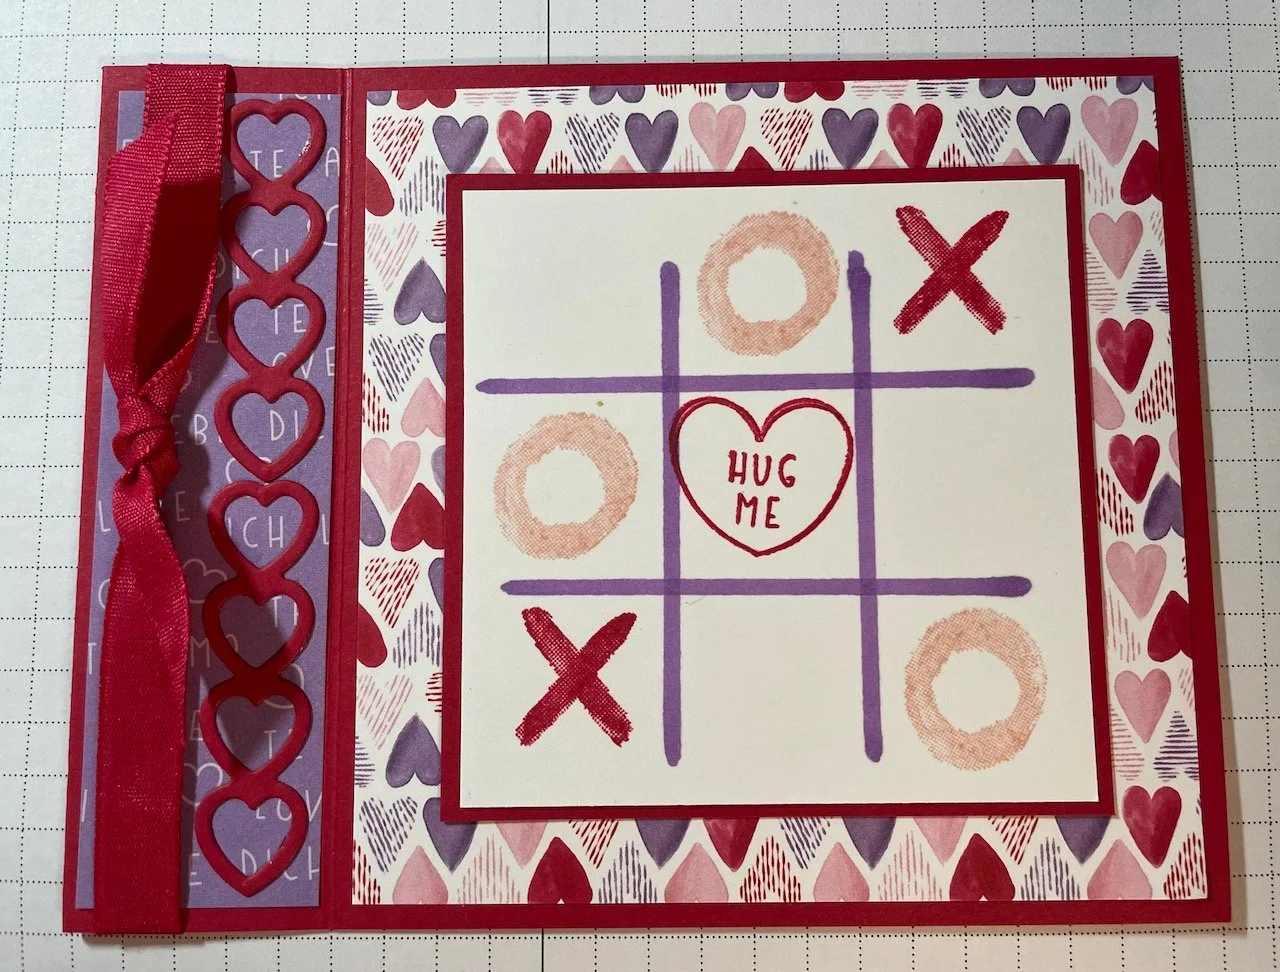
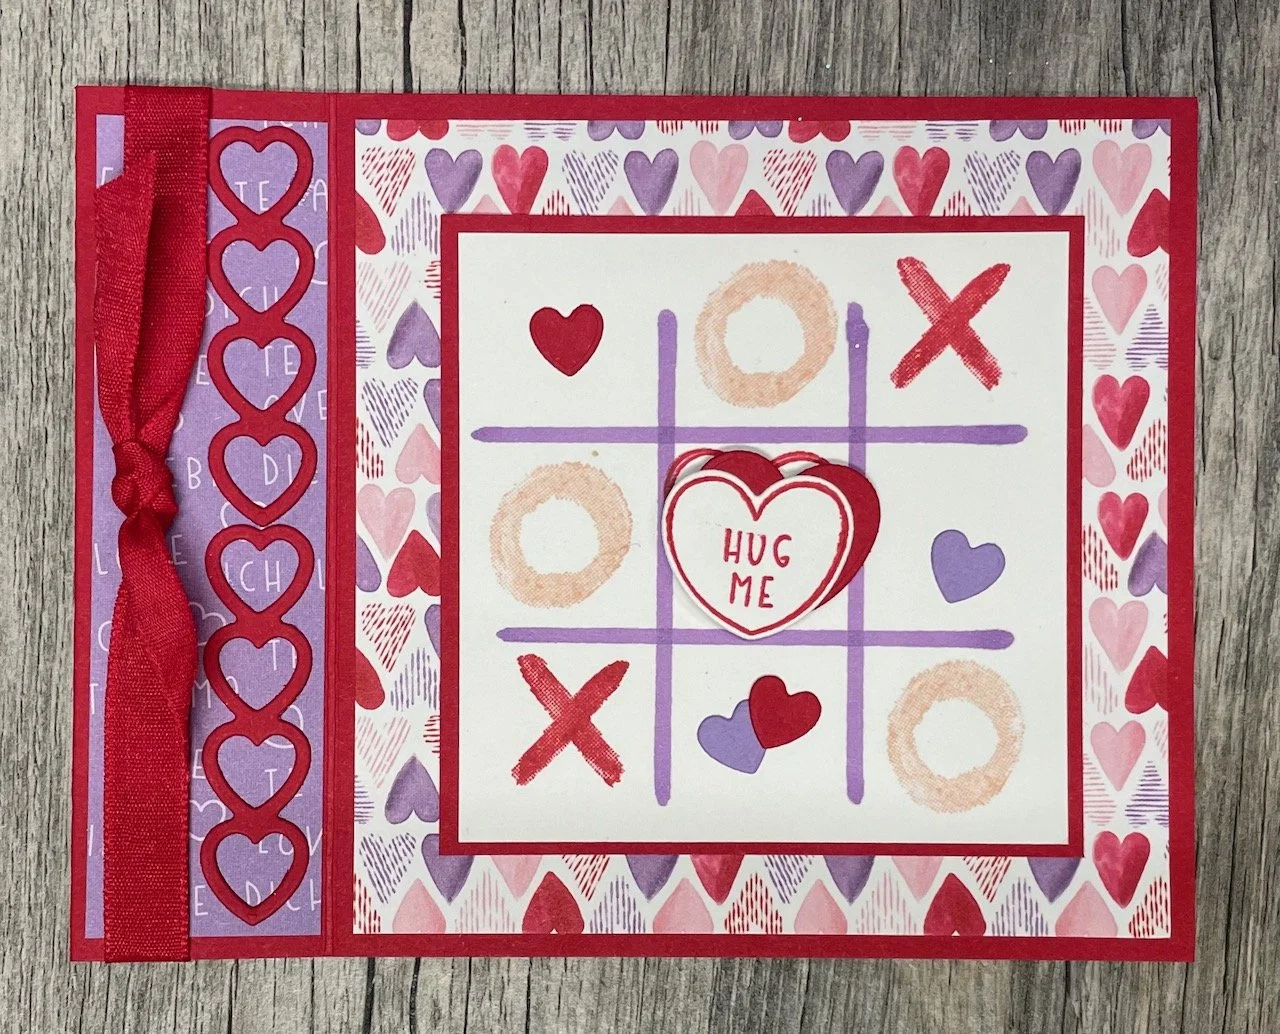
The Sweet Conversations stamp set has a cute “X” and “O” that totally makes me think of Tic Tac Toe…..so here’s my first card using the set with a picture tutorial.


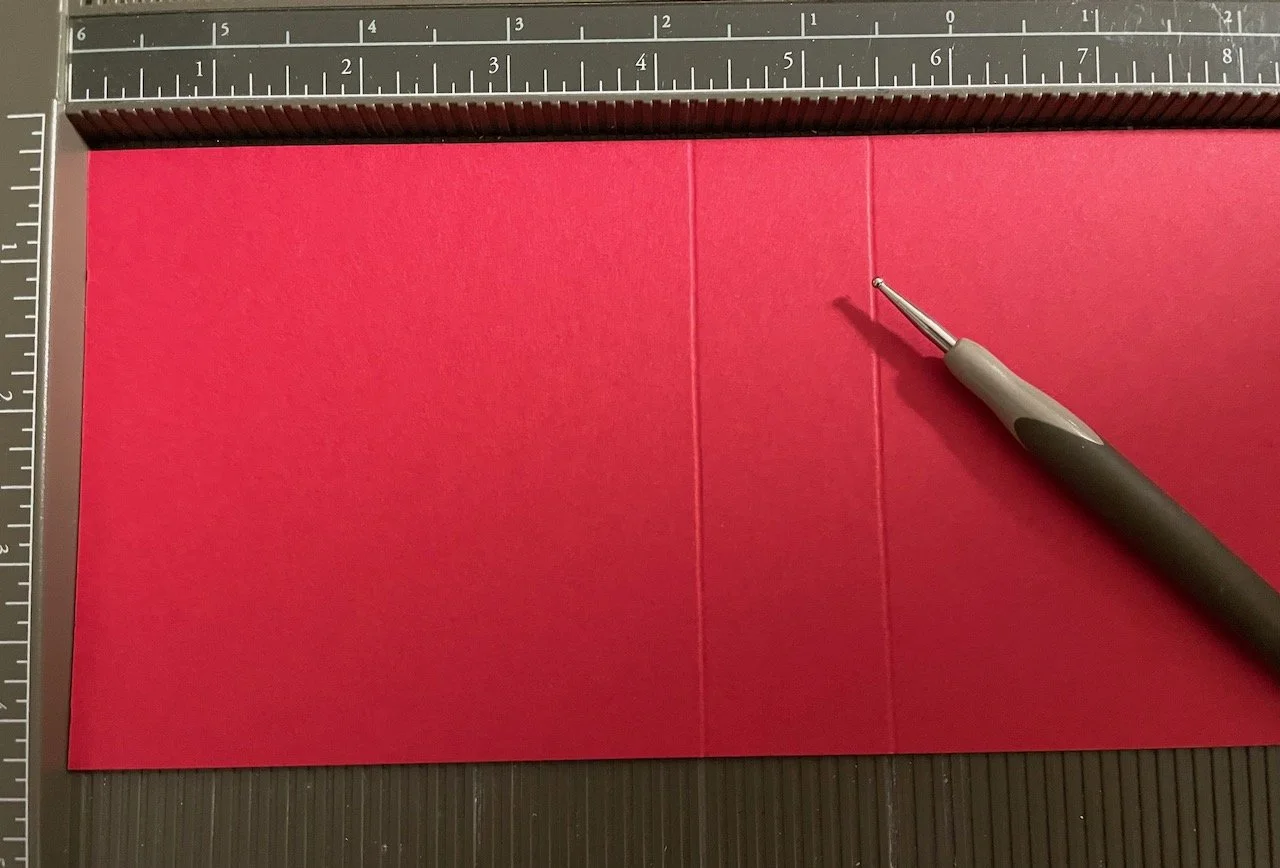
  • You will need a piece of Real Red CS cut 11” x 4 1/4” and score at 4 1/4” and 5 1/2”


  • Cut a piece of Real Red CS that is 3 1/8” x 3 1/8” to use later as a matte

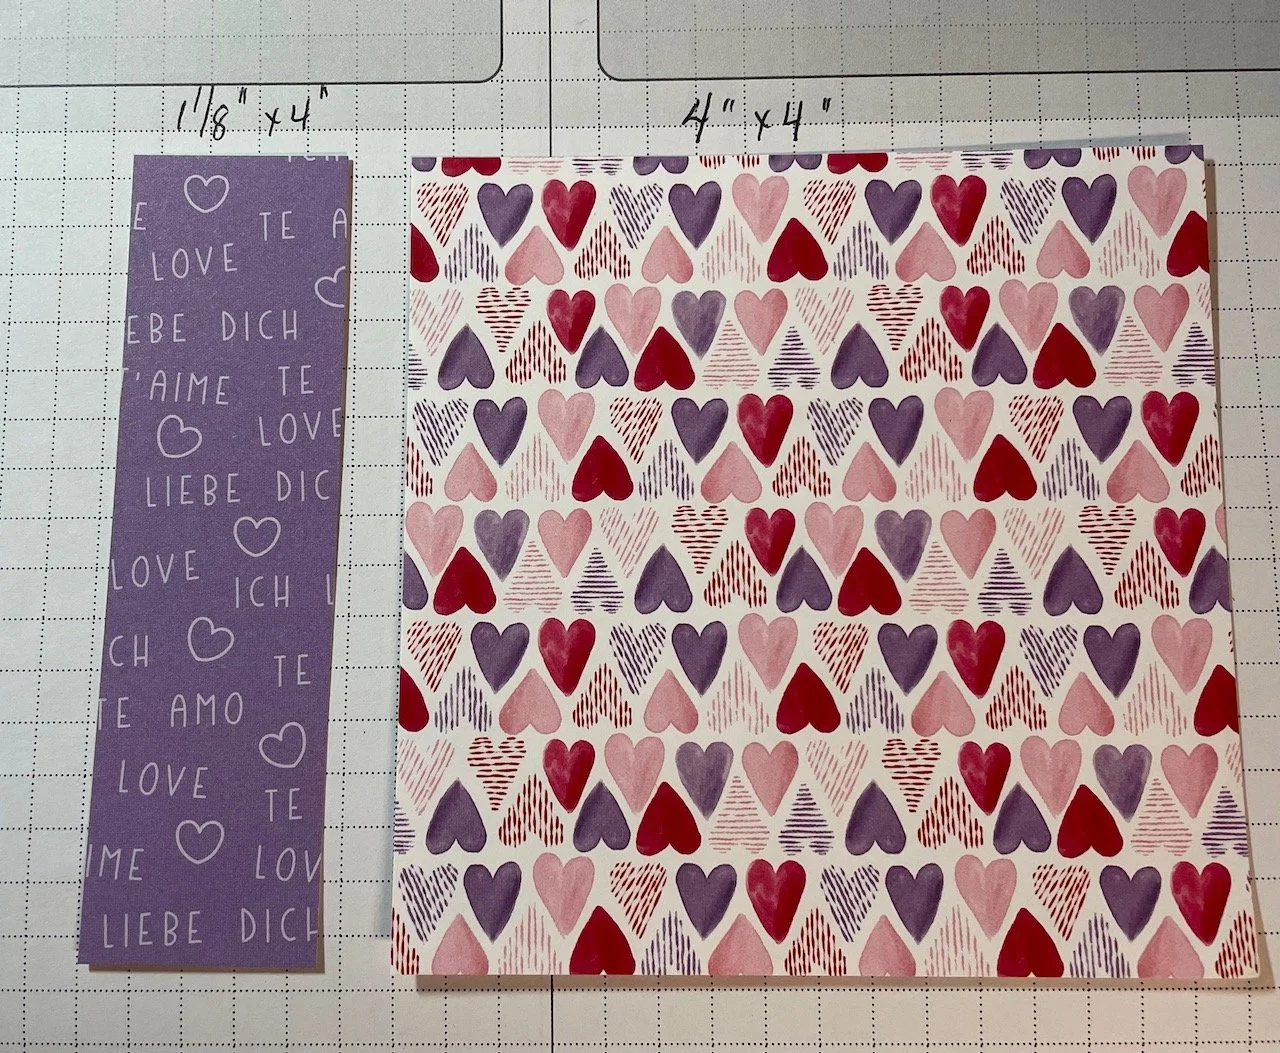
  • Cut Sweet Talk Designer Series Paper 1 1/8” x 4” and 4” x 4”


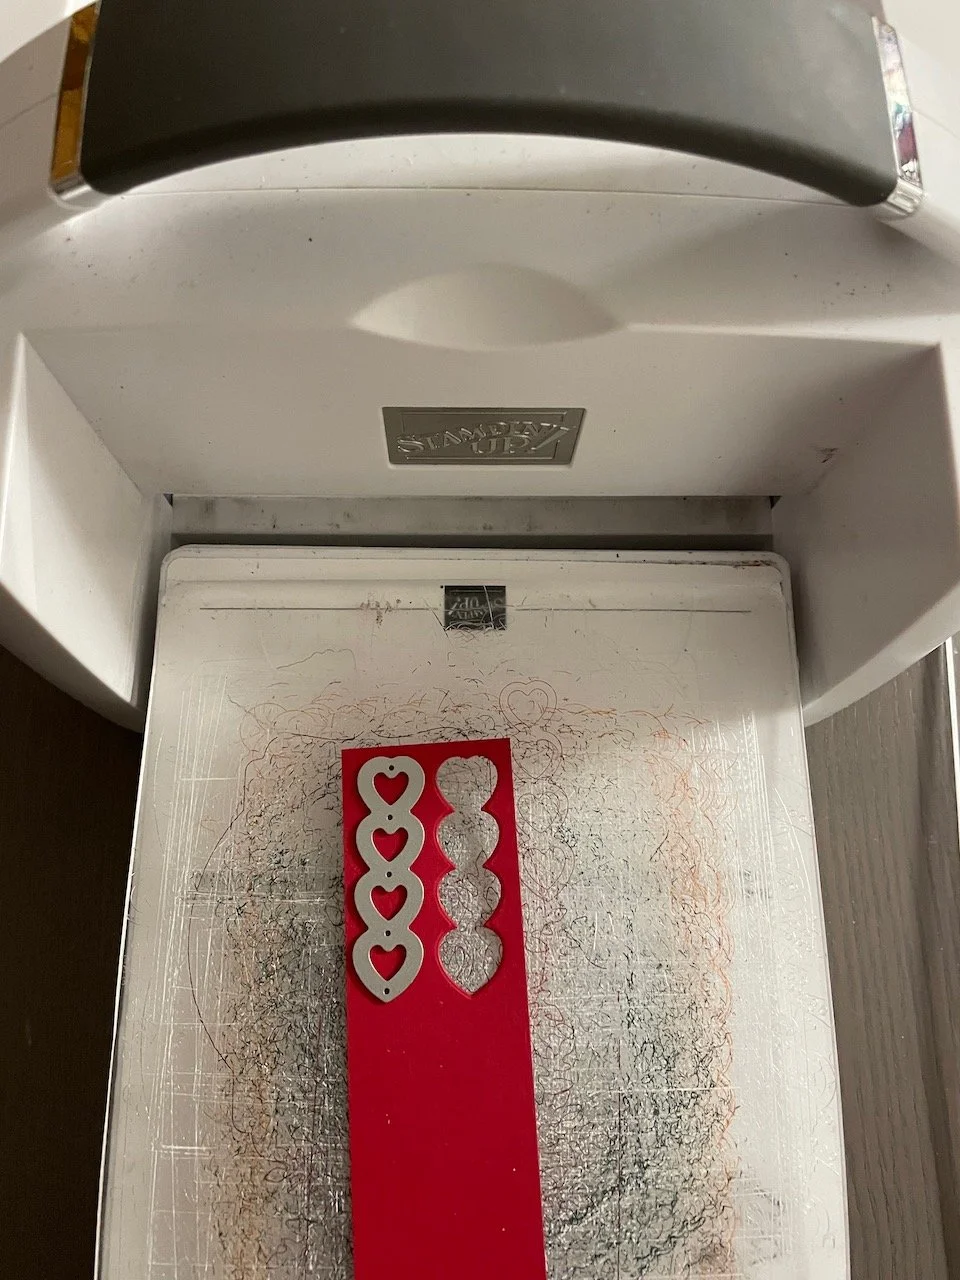
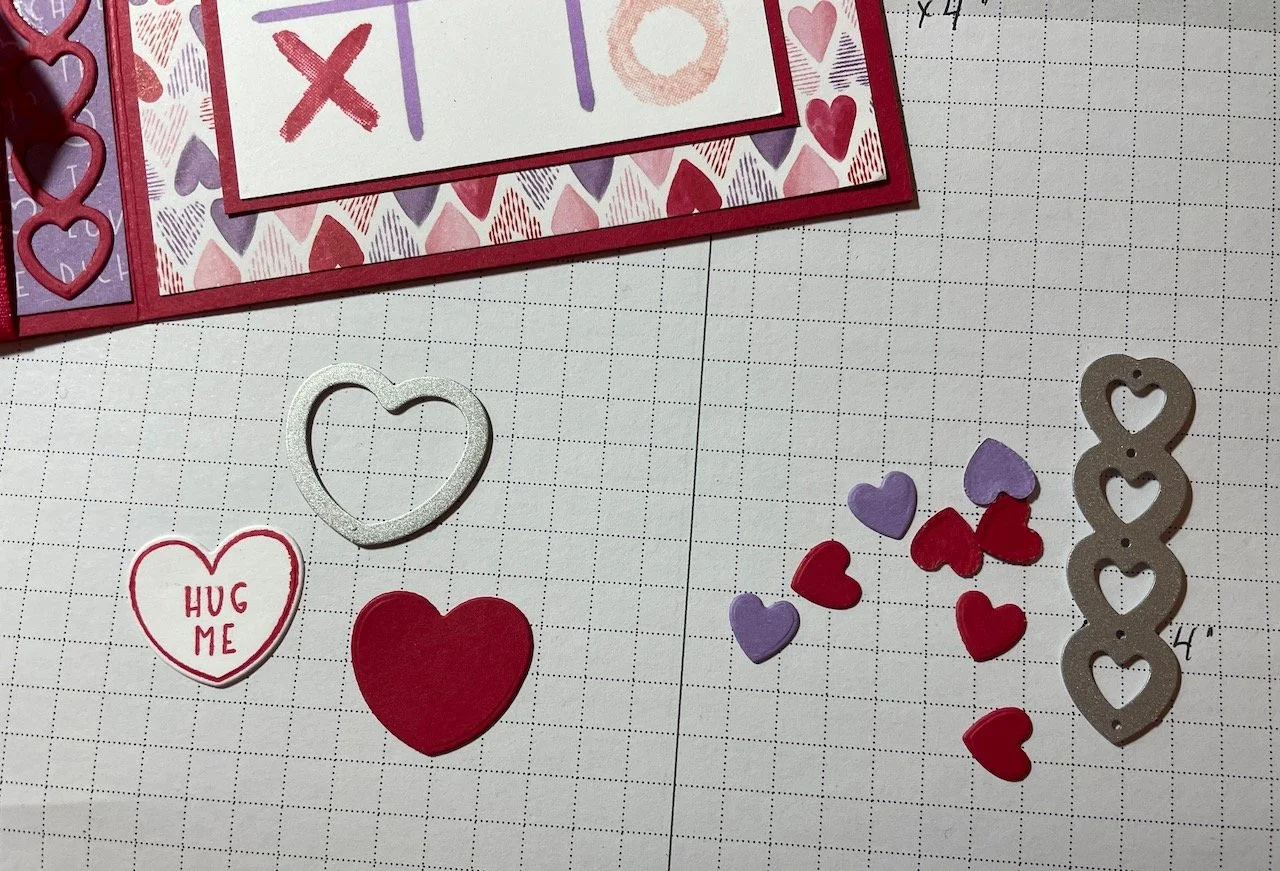
  • You will also need 2 die cut pieces of vertical hearts (from Sweet Hearts Dies” in Real Red CS - save the inside hearts for later use :)


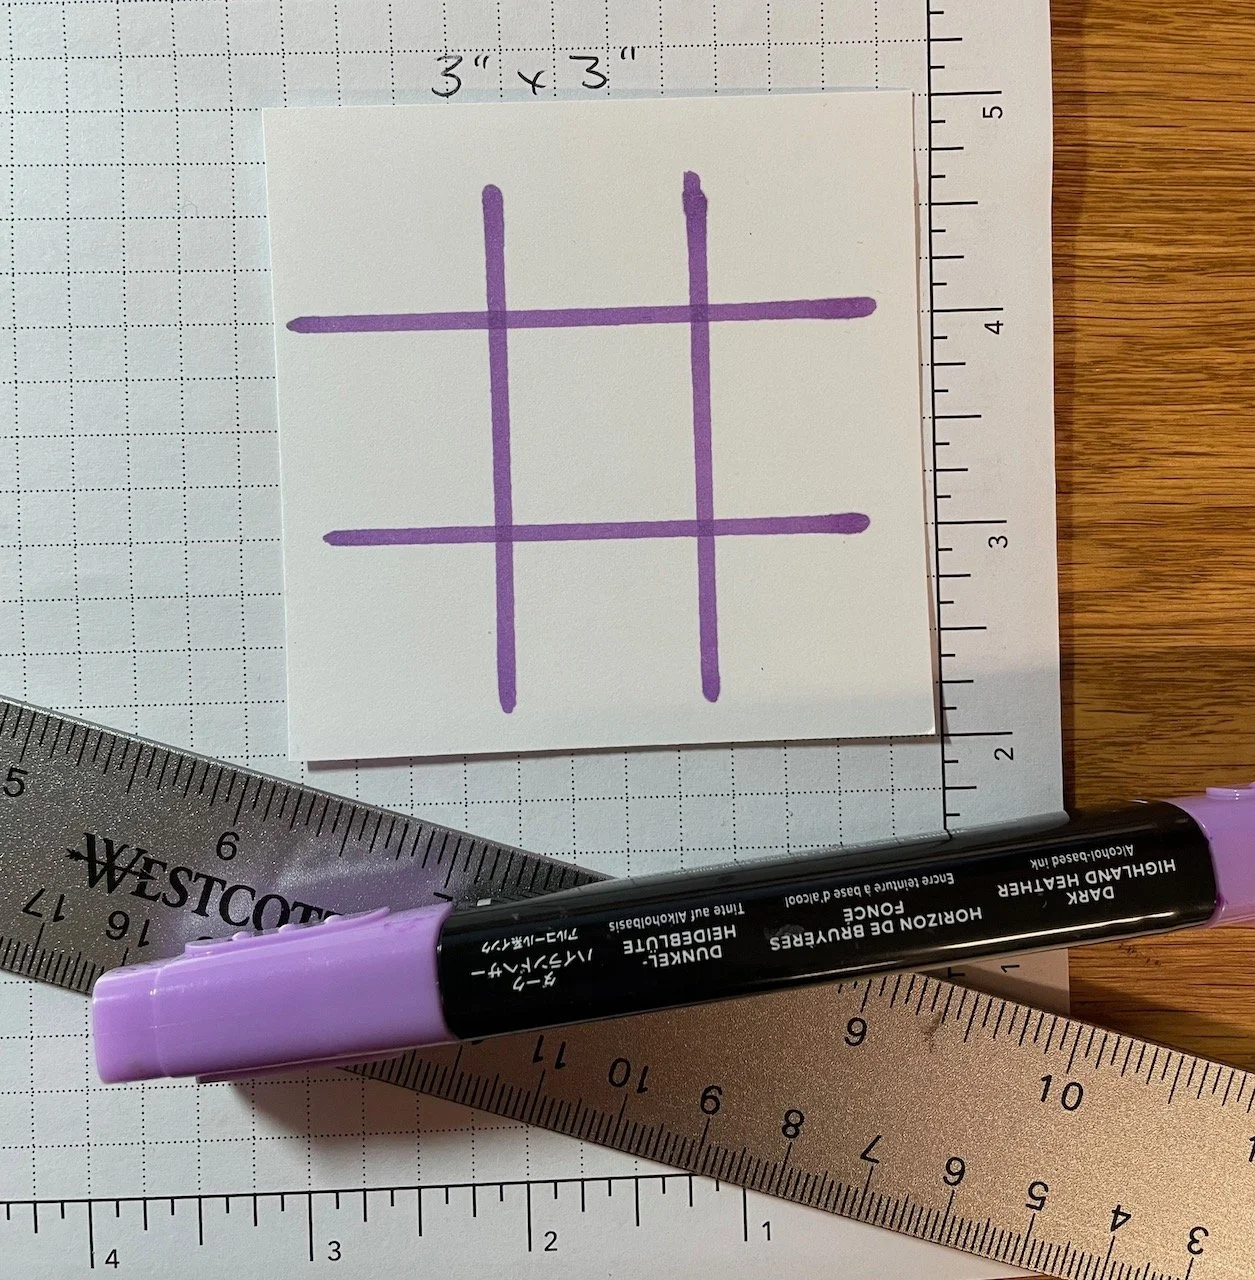
  • Cut 2 pieces of Basic White CS measuring 3” x 3”

  • Begin by placing one piece on your grid sheet to help as a guide to draw a line with your Dark Highland Heather Blends marker and a ruler

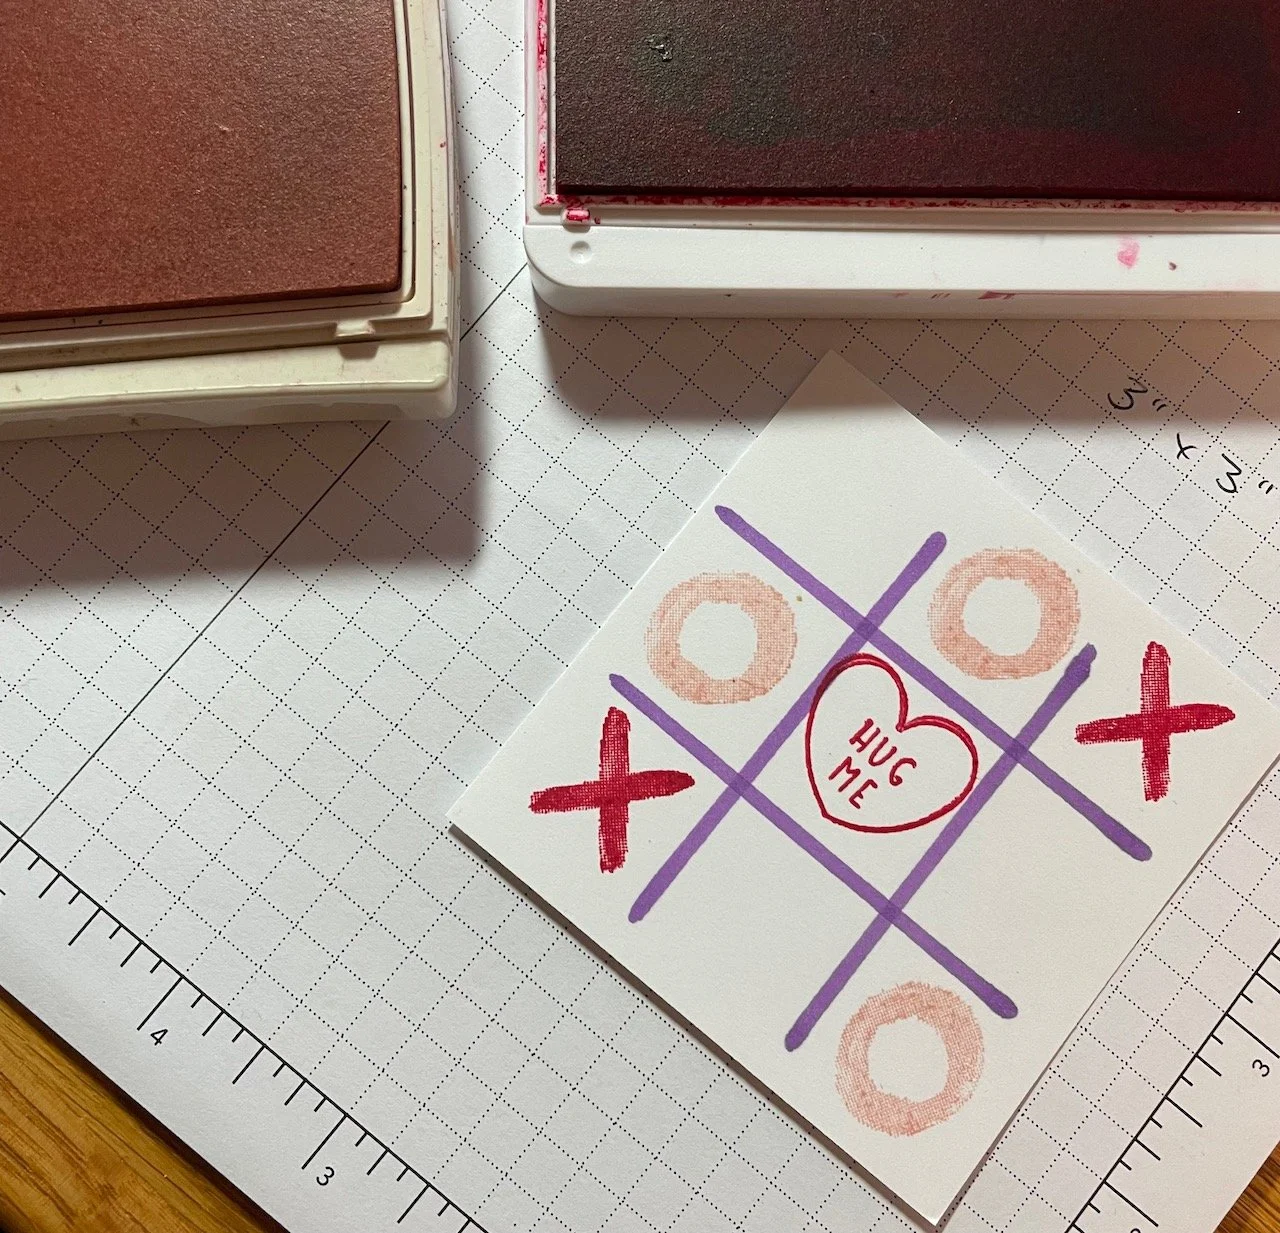
  • Continue by stamping using Real Red and Blushing Bride ink pads

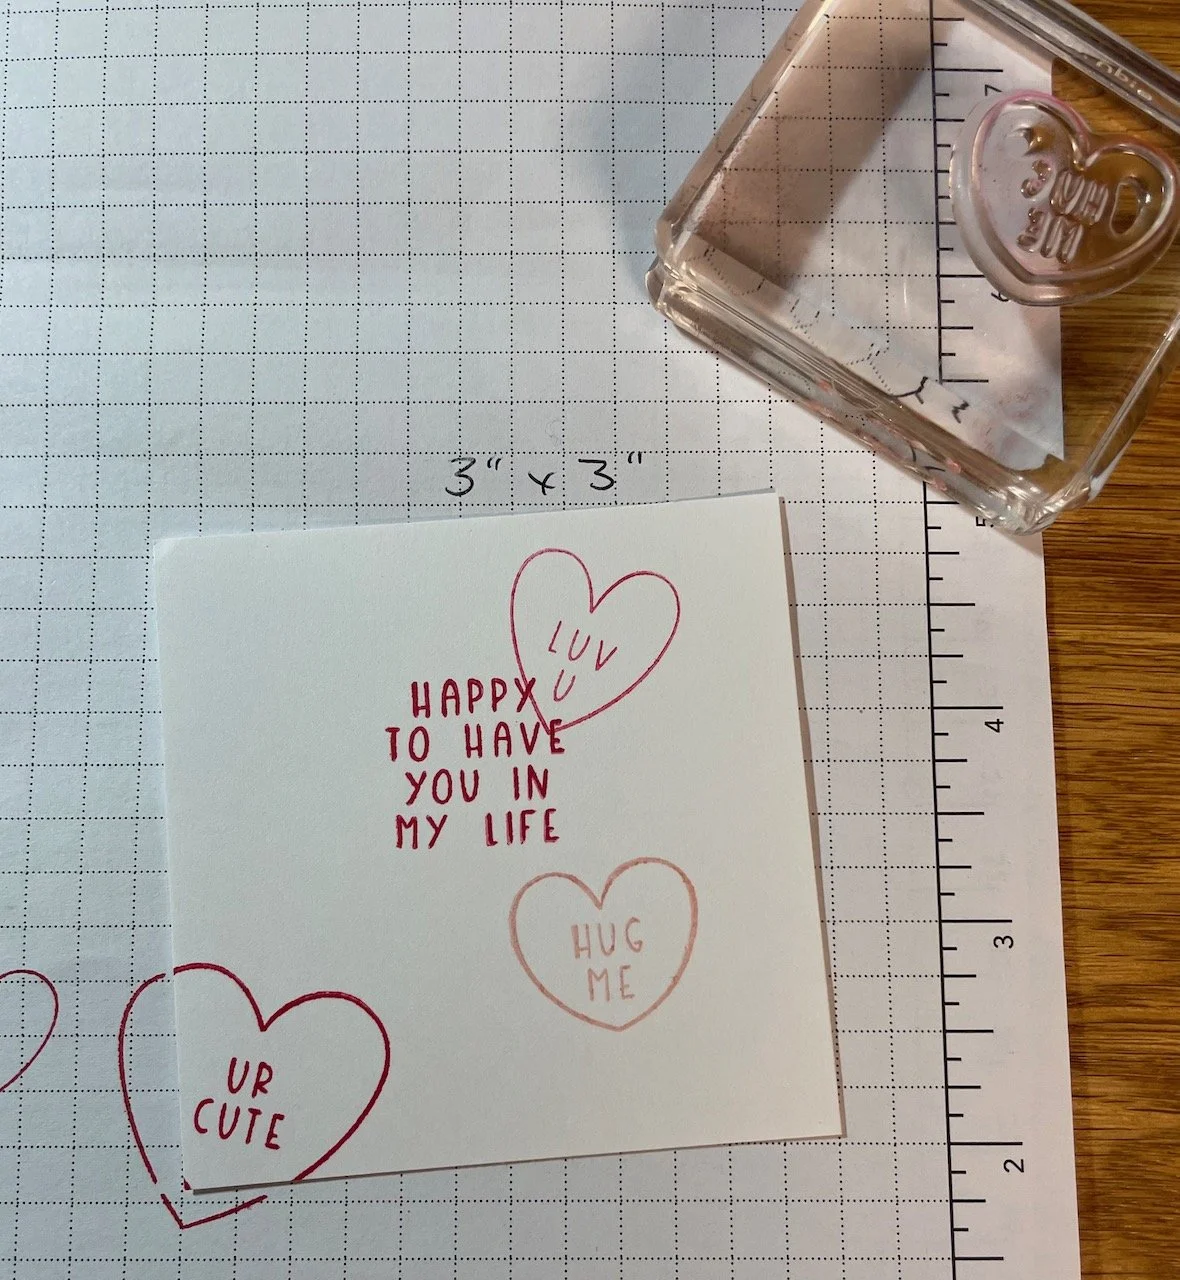
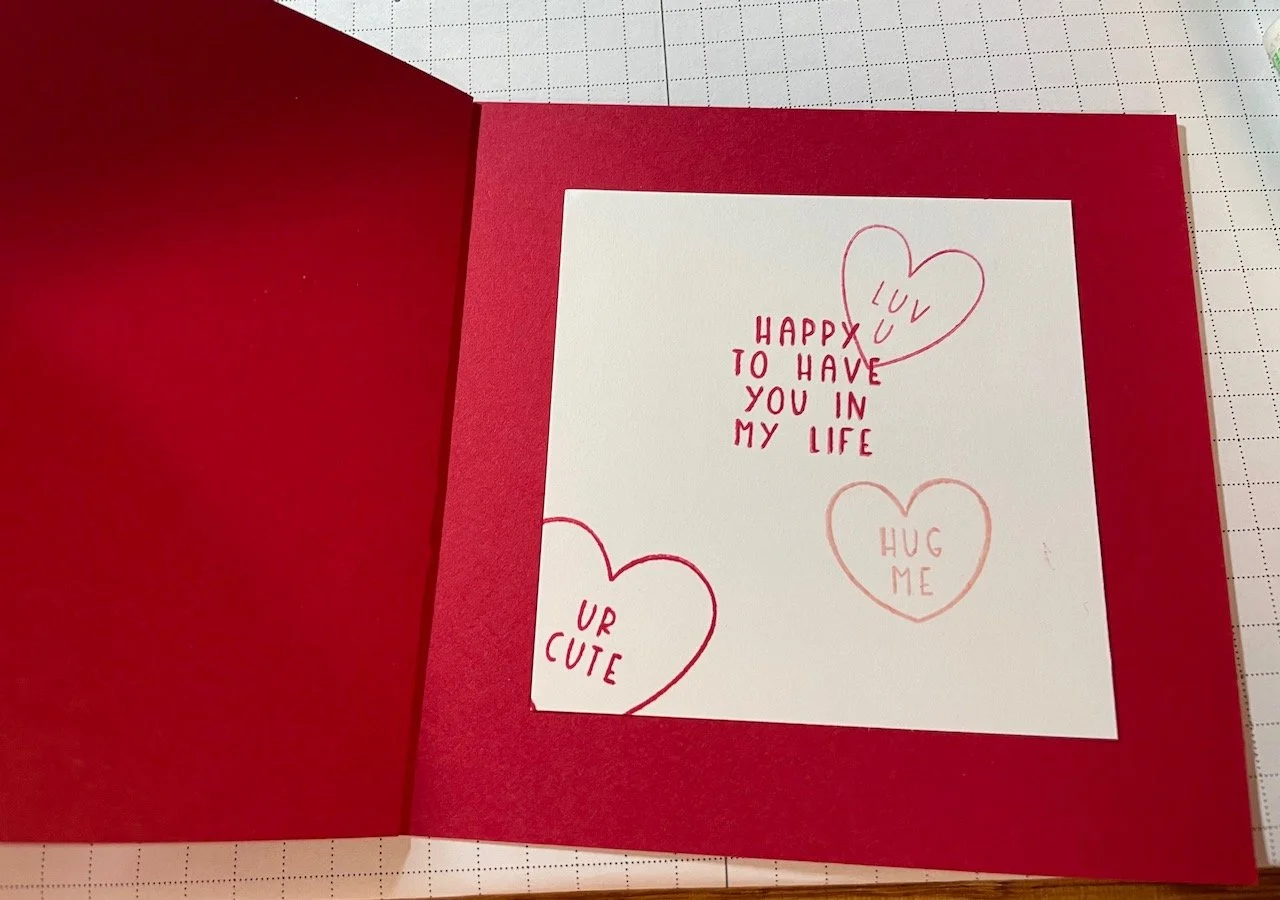
  • while the stamps and inks are out, stamp inside as you desire. Here is my design. I just had fun stamping for the fun of it!


  • time to put your card altogether now!

  • Start by adhering the narrow strip of DSP to the card front between the 2 score lines….put DSP beside the right hand score line so there is 1/8” of Real Red CS showing on the left side

  • adhere the die cut vertical hearts

  • tie NEW Real Red Faux Linen ribbon around card front. You will need about 14 inches for a knot or more if you tie into a bow

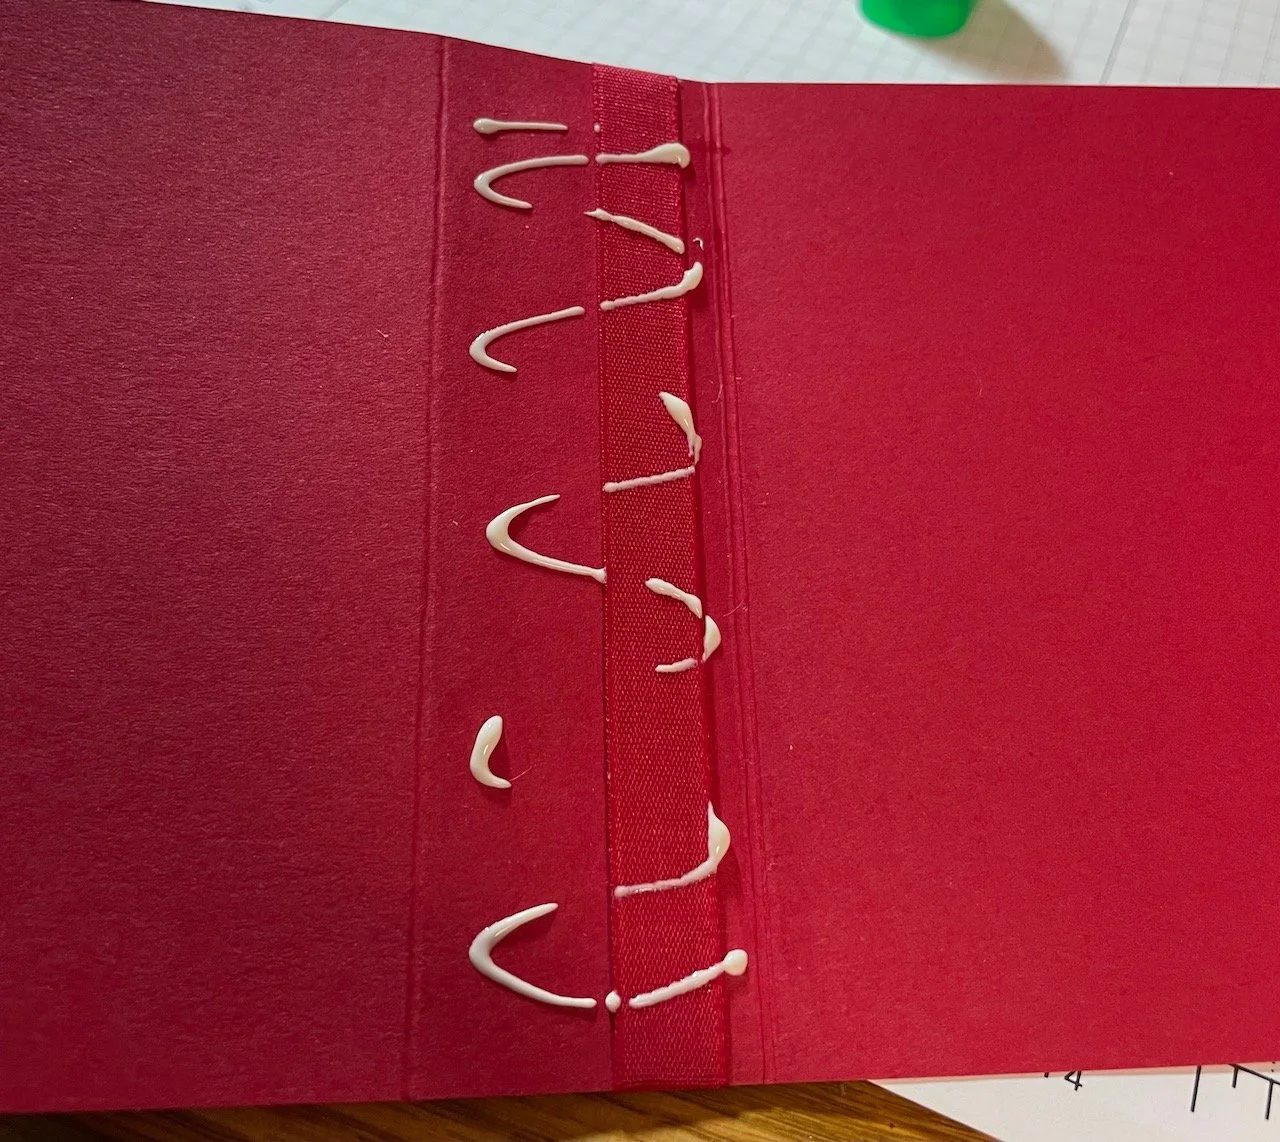
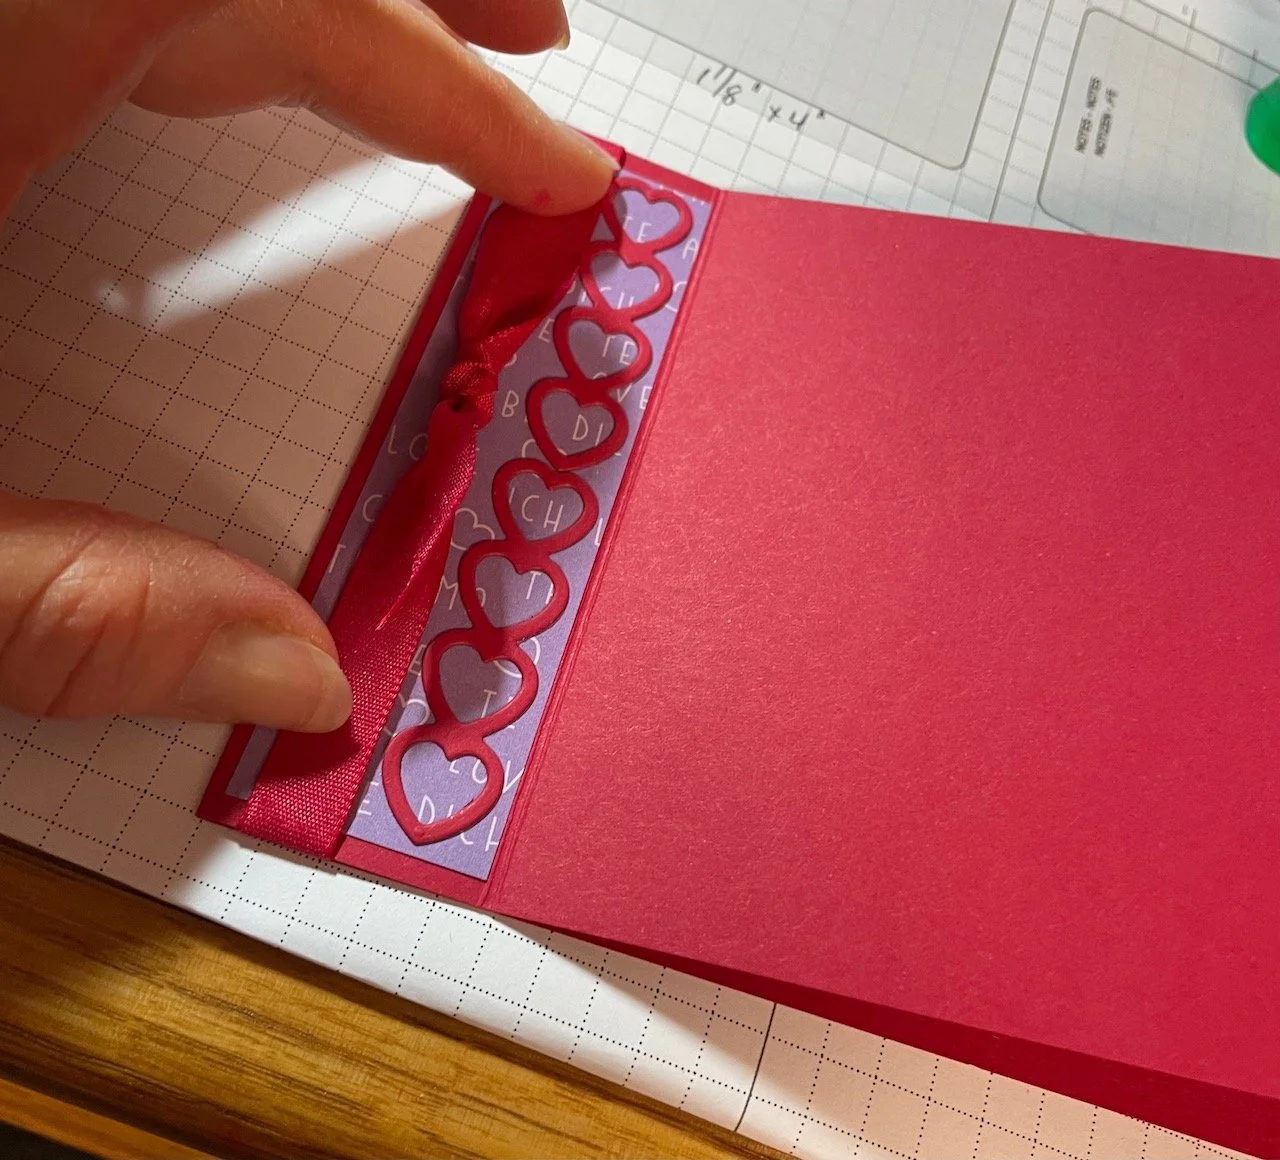
  • Next, adhere the inside of that narrow part closed on the inside to create a square on the card front and inside

  • Finish the card front by adhering the 4 x 4 piece of DSP

  • Attach the stamped card front to Real Red matte


I’m liking the card, but oh! let’s add a little more to it to make it extra special! Just a bit more die cutting and using those extra hearts that got die cut earlier


Please check the retired list! Some products are completely sold out already. Below you may click the buttons for a complete list. I am including a tutorial for one of the cards made from Happy Holly-Days Bundle. The punch is on sale - 20% off #156379 Now $18.40. Other savings of 50% off on Wise Men Dies $14. and Christmas Cheer Dies $17.50 and Sweet Stockings Dies are $15.50 now!!!

Also, check out the CLEARANCE RACK. It has had items added to it recently. Be sure to scroll all the way down and click LOAD MORE to view all the clearance rack products with great prices!

Use hostess code C9WVKDUJ when ordering if not associated with a club order and under $150 please. Click tab above to order or go to www.estherboyle.stampinup.net


I’d love to see you stamping with me! Have a fun week and stay warm and safe. Thanks for visiting!

Esther

Craft Fair December 4th

It’s a Holly Jolly Time…..the song keeps going over in my head! Time to decorate and finish Christmas shopping and making your Christmas cards to send! Sending a handmade card to friends you don’t see often is such a sweet treat and encouragement sure to bring a smile!

Double check your supplies…..and order soon. You may want to look at some of the things I’ve been creating for craft fairs to make and give as a small gift too! Contact me with any questions on a project you may have.

Or you may come visit me at the Cramerton Holiday Bazaar on Julian Sr. December 4th from 10am to 2 pm. There will be lots of venders including me to get your in the spirit of Christmas!

The month of December, we’ll celebrate with a pot luck for most of my clubs and then in January and February of 2022 - yikes 2022! We’ll have a new mini catalog, January to June and Sale-a-bration!!! You may have seen some sneak peeks….but there is an absolute gorgeous set of dies for daffodils, cute little hedgehogs with a punch, and beautiful flowers and birds!

February 26th - I’m planning another mini Creative Escape….still trying to come up with a different name. This one will be 20 Birthday Cards! 10 different styles, 2 of each. I’ll start taking reservations in a couple of weeks.

See you stamping!

Esther

Peaceful Place Designer Series Paper Scrapbook Spread

I admit, when I first saw the all gray in Peaceful Place DSP, I didn’t see the beauty…..but the more I have used it, the more beautiful it is!!! Totally you need to see this in person….it is so so beautiful just like a icy frosty sunny morning.

I invite you to join us scrapbooking….usually the 3rd Saturday of the month at 6pm at my home. Beginning January, two 2-page spreads are $20 plus free girl time with the ladies! Our other spread features the Sweet Stockings Designer Series Paper for your sweet paw prints in your life.

Let me share 2 wonderful cards I received this week that made me smile! One is from Cathy and the other from Debbie. Thank you for the encouragement you each gave me this week!

Christmas gifts to inspire you:

I’ve used Stampin’ Up products - some are retired, but they will give you ideas you can use with the current products too for stocking stuffers, teacher gifts, neighbor gifts, and co-worker gifts to bring a smile to everyone! I will be vending at Market Cafe in York SC on Nov. 26 and 27th. Please tell your friends to come and shop! I hear the Cafe is delicious.

To order your Stampin’ Up supplies, please hop over to my website: www.estherboyle.stampinup.net or you may email with any questions and support from me. I’m always happy to talk with you directly!

Calendar is updated above.

Have a wonderful, fun, tasty Thanksgiving!

Esther

Stampin' Up Seasonal Sale


A great way to shop….Stampin’ Up Seasonal Sale to restock on your Card Stock, Ink Pads, and Dies! Save on the basics you use every day!

3 Days only, Nov. 16-18

The discount includes:

  • 10% off cardstock,

  • 15% off ink pads (excluding ink pad bundles and third-party pads), and

  • 20% off dies.

  • The discount applies to products featured in the 2021–2022 Annual Catalog only. Products from the July–December 2021 Mini Catalog are not included.

  • Click the link below for a list of sale items and prices

  • To order, please use my website: www.estherboyle.stampinup.net or email/call me

  • Use hostess code JTKKHFXM if you are placing an order under $150. Enjoy the hostess benefits if you place over a $150 order

November is an awesome time to get the demonstrator kit too! Normally $99, this month the kit is only $75! This gives you:

  • a choice of $125 Stampin’ Up products

  • 20% discount on your sales as a customer or 20% income selling to others (although selling is not required)

  • Ordering from new Stampin’ Up catalogs early

  • Joining my community of team, stamptogether

Please reach out to me with any questions you may have….this may be a right opportunity for you!

Come visit me at The Garden Cafe in York SC for Holiday Open House and Marketplace at 307 W. Liberty St. York SC

I will be there vending some crafts made with Stampin’ Up products. Take a look at what we’ve been working on this past week. Note and pen holders that sit on your desk or work area. Love that Sweet Little Stocking and Peaceful Prints Designer Series Paper from Stampin’ Up to make them so attractive!

And….I always love to show off the beautiful cards I receive! This one is from Jill. She used one of Stampin’ Up card kits.

Thanks for visiting today! I love hearing from you all! Take Care!

Esther